Monday, February 21, 2011

AND WE HAVE A WINNER!

This is so exciting... Congratulations to Brenna! Winner of my first (and not my last) Blog Candy Giveaway!

Brenna wrote:


what a great giveaway!! Congrats on 100 Followers, and I've checked out your blog and there will be many more followers!! can't wait to see your new creations!! I have posted your giveaway on my blog sidebar at http://brennasblitherings.blogspot.com
thanks for the chance to win!!
Brenna

rbanderson@live.ca

Wednesday, February 16, 2011

This and That... and Blog Candy - YUM!

Hello everyone...
What a busy few days this has been. I have to learn how to turn off the automatic pilot in my car that keeps turning whenever it sees a Joann's!  I can't believe the great bargains that I have found there lately!  Paper stacks for $1.97!  Clear stamp sets for $1.00 wow!  I am going to have to shop in another town just to avoid that store!


I have been busy also working on a new over sized tag. I have one to make for winter and one for the up coming spring season, at least that is the rumor that spring is coming. My goal is to have one of the tags for each season and use them as a home decor item. I love to decorate and these window will look great in the living room!

Oh, I wanted to let you know that I have added a link on the Flower Shower Mini post a page or 2 back for you to download the Design Studio cut file.  I have tried to email the file as an attachment to several people and either my provider or theirs won't allow the file to go through. This should be easier and everyone should be able to get the file if they want it.  Here is a direct link to the POST.

Ok.. now for the really good stuff... BLOG CANDY!
 I am approaching 100 followers and when I reach that magic number I will be do a drawing for Blog Candy. Below are pictures of the goodies the winner will receive.


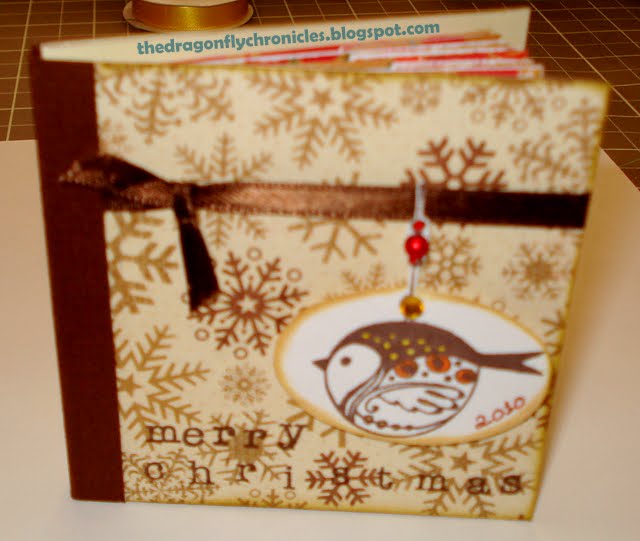
 This is a book I made. I have several of them myself and keep one close by at all times!


In order to be eligible for the giveaway:
1- You must be a follower of my blog
2- Share the giveaway on your Blog, Facebook or Twitter
3- Leave a comment on this post with contact information and links to step 2

Thats it... short and sweet.  Posts will be accepted until Midnight on February 20th, and I will pick the winner on the 21st. at Noon.   Good Luck ... This is really exciting!


Saturday, February 12, 2011

From the Unfinished Project Department

I really am in the mood for summer!  I have finished a mini that I started when we got back from our summer vacation to Cape Cod.  I wanted to have it done long ago but with the holidays coming it did get started but never finished. Below is an experiment, I got Smilebox and am trying it out. I hope this works. Feed back would be appreciated.

This will send you to another site, so if you don't want to do that, I will understand.

Click to play this Smilebox slideshow
Create your own slideshow - Powered by Smilebox
Photo slideshow generated with Smilebox


Thanks for stopping by... Stephanie

Friday, February 11, 2011

Welcome New Blog Followers

I usually send out a quick note to new blog followers telling them how much I applicate their following my blog, but lately Friend Share has been down and I cannot use the same method to send out a thank you.  So I would like to take this opportunity to say THANK YOU!  To all new blog followers and another Thank You to those of you who have been with me for a while!  I enjoy this blog so much and know that you have here with me really gives me that boost I need to keep going!

Monday, February 7, 2011

Flower Shower in the Middle of Winter?

Hello... Yes, its been a while but I am sure you know how it goes, busy with work, family, studying, and trying to squeeze in scrapping and blogging makes for some interesting juggling!

But I have found a little time to work on a mini.  I am so desperate for summer at this point that I went ahead and made a Summer mini! There is a hill on its way to becoming a mountain in my front yard that is not melting and we are going to get more snow before this is over... ugh!

Ok.. On to the good stuff.. The mini was made out of "money envelopes" that I designed using Cricut's Design Studio.  I wanted to have something that wasn't going to be to heavy and easy to work with.  All the paper and embellies in and on the album are from the DCWV Flower Shower Spring Stack.  This is last springs collection and it is beautiful wonderful papers in this and the embellishments and sticker packs are great too!

Here is a short (ok.. not overly long) video showing the Mini..


If you would like a copy of the DS file leave me a comment and I will forward it to you. I used only the George cart. to make it but I am sure if you don't have that one I could make it using Plantin Schoolbook. UPDATE - You can now download the file at this link!

http://www.4shared.com/file/MQUpqfKo/large_money_envelope.html


I have tried to send it out to people but I think the file is to large or people are not accepting attachments... either way, you should be able to get it here!

Thanks for stopping by, Leave a comment... I love reading them and knowing what you think!

Sunday, January 2, 2011

Happy New Year!

I am so excited about the new year and all the great things that I am sure it will have in store for all of us!

I have started a Yahoo Group for folks that are new to the Cricut and want to get to know more about these wonderful machines.  The focus on the group will be on monthly challenges and chat sessions along with Ustream classes and chats.  I am very excited about this and would love to have you join us.  The group is new and there aren't a lot of us but it is growing and I am sure that as we move on more and more folks will join and will be sharing their knowledge!

Here is the first challenge from the group that I will share with you, if you would like to join the challenge, the link to join the group is below on the side bar to the right!


Challenges are going to be a monthly event and everyone can post their challenge project in the folder for that month. Sometimes the challenge will focus on a technique or an idea or a tool. Each challenge will require you to use your cricut.  The object of each challenge will be to get us using 1-what we have and 2 our imaginations!
Each month between the 1st and the 3 of the month the challenges will be posted and you will have 3 weeks to complete and post them.  If you post your challenge on your blog, please be sure to send a message to the group with your blogs address so we can visit you there as well!

If you have experience with one of the features/techniques listed please bring that knowledge to the group.  I want to learn from you and this is a great way to do that! Check my YouTube channel each month for detailed instructions on how to use each feature in relation to our monthly challenge.

1- Cricut Valentine's day cards - based on a song title, using the cricut cartridge of your choice. Your card should be an A2 size card and have at least 1 Cricut image.  

I will share my Valentine's Day card with you (as soon as I make it!)

Again... Happy New Year to you and yours!

Monday, December 13, 2010

Happy Holidays!

Hello Everyone!  I love Christmas!  The only other holiday that comes close the the fun factor is Halloween. Thanksgiving is my family favorite and I look forward to this time of year for all the fun and good times spent with friends and family.

I have been crafting and creating and am so excited about the things that I have finished.  Last year I made Coco mugs for coworkers and this year, I am making mini albums.  The minis that I am making are the 1 page wandering minis that are quick to put together and look wonderful.  I have spent time decorating the cover and am leaving the insides plain so that they will have the opportunity to decorate them as they see fit. 

Here they are a few of them that I have completed so far.  I have a few more to make.  Luckily, I can make 2 or 3 in an evening. because the insides are blank and I use my Cricut to cut the tags for the inside of the minis!


I used DCWV paper from last years Holiday Collection and this years Christmas Combo 8x8 pack. What nice paper!  There are a few more but you get the idea, and the idea behind each is much the same.  I am going to make one of the little Pizza boxes that Mary from CardzTv  demo'd to pack them in. It will be nice to  have a small box to match the albums paper or color scheme. 


Months ago,. I was watching videos on Youtube and saw a memo board made on a Cookie Sheet done by Northrose42.  I was so very inspired by this that I had to 1 - buy the Create a Critter cartridge and 2 - make a board for myself.  

I was at Joann's and I love their Clearance Section... and was very happy to find some of the nicest paper I have ever seen.  It's by K& Company designed by Tim Coffey called Tuscan Sunflowers.  BEAUTIFUL Paper!  Anyway, that is what I used for my memo board and I have a sunflower boarder in my craft room!


 I also used cork paper from Karen Foster Design, that I cut in half and then trimmed both halves to fit the bottom of the pan. I stacked them so that they would be better able to handle tacks when I need to put something on it.  (the cork paper comes with an adhesive on the back... how hand is that!)

For Birthdays I used a stamp that I bought from AC Moore and don't remember the maker... but its a nice stamp with the months listed around the stamp and you can circle the month that you are using. I stamped 6 blank index cards on the front and back so that I can turn it over once the 6 moths are over and use them again.  
 
I have to say that I had some sheet magnetic material available and used it for some of the elements but it was not strong enough to work well through the paper, but store bough magnets worked well.

The clips on top are book binder clips and I will use them to hang the pan I might have to get larger ones but these seem to work for now. 

I will post again soon, as I have more projects to share...  Hope to "see" you again soon!


Sunday, November 28, 2010

Christmas Cards Part 2

Hi Everyone!  

Here is the second batch of cards I have made for this Christmas Season.  Some are really simple and quick to make and 2 will need a Cricut to create.  I made Snowmen from the Joy of the Season cartridge.  One of the things I really love about the Expression is that you can use that fill the page option or if you know how many exactly you need use the Quantity Option!  I wanted to make 12 Snowmen and was able to just enter 12 and the size I wanted to have the snowmen and I was ready to go.  Very nice!

Card 1 - 3 Snowmen


3 snowmen cut 4 inches.  I did color in the eyes with black marker, the pieces that were cut with my circut were just TOOO small!  The ribbon behind is a wired velvet ribbon sold on a large spool.  It is a really nice ruby red that you really can't see well in the picture.

Card 2 - Poinsettia 


Quick and easy!  this card has a pre-made Poinsettia with a little bell and wired ribbon (I ran into a good sale at a local surplus store) and connected the ribbon to the green paper and adhered it to the card base.  


Card 3 - JOY


Ok.. I really cheated here.. I was going through my scrap pile and found 3 green squares that were left over from another project... I had stickers from a paper pack... and there you have it a card!  Instead of using Sticles on the squares, I used the Quickie Glue Pen by Sakura to draw my Faux Stitches and then glitter for a bit of bling on the card. The background layer is from DCWV as were the stickers. 


Card 4 - Gatefold Snowman


Another quick card, a simple gate fold with a band across that has DCWV paper from their Christmas stack from last year cut to show only the wording, my Snowman from Joy of the Season and Green cardstock from AC Moore.  I drew on the snowflakes with a red and purple glitter pen.

Thanks for stopping by. Please Leave A Comment!

Friday, November 26, 2010

Christmas Cards

Hi everyone!  Today the day after Thanksgiving I have taken a moment from the craziness of Black Friday to post a few cards that I have made lately.  I was going to make cards using mostly Cricut cuts, but it turns out the cards that I found myself making only used one cut from the Christmas Noel cartridge and the rest were based on paper, and ribbon and things cut from stencils.


I really enjoyed working on these cards, it became a challenge to make as many cards using 8x8 or 12x12 sheets of paper and digging out the punches from the drawer and put them to use.


OH... speaking of punches I used the Martha Stewart branch punch to make the wreath on one of the cards and found that the punch was a bit stiff.  It was not working the way I expect a MS punch to work.  Oiling a punch is not a good idea, as you will be wasting several punches and much time trying to get the oil off the metal to avoid the oil on your good card stock.  What to do... I tried the wax paper technique, that worked for a bit but then the punch  quickly began to get hard to punch again.
After much Winnie the Pooh type thinking... I came up with a plan... 


I took a sheet of computer paper and sprayed WD-40 LIGHTLY on the paper.  I then punched and punched until the punch was easy to use again.  This worked great.  Once it was easy to punch again, I got a clean piece of paper and punched 3 times and saw no oil!  YEAH, it worked and the punch is as good as new!


Okay.. on to the cards. I will be posting 3 cards today as I am running out to yet another store in a few moments... Tomorrow I will post another batch!


Card 1 - Joy Banner


This is a standard A2 card that I inked around the edges with Vintage Photo, the banners are triangles cut from Bazzill card stock and the background paper is from DCWV.  I used an EK Success punch to make the  banner trim and the pompoms are trim that I got at Joann's a long time ago!  Buttons  are attached with Fabri-Tac (this is great stuff!)


Card 2 - Noel Glitter

This is a very basic card.  I loved how quickly it went together and will be making more for the folks at work. This again is an A2 card with red and green card stock.  The ornaments were cut from an old stencil and mounted with foam tape. Stickles was used on all the ornaments and NOEL was written with it as well. Faux stitches were placed on top and below the green card strip.  

Card 3 - Wreath Christmas
And now for my favorite card!  I made the wreath and used paper from the DCWV Christmas pack on black  cardstock with white cardstock as the first layer. This card is just larger than an A2 card measuring 5 3/4" x 4 1/4" (just a bit larger). I decorated the wreath with Stickles to make it look like it was lit, very nice effect.  Merry Christmas was stamped with Versa Mark and black embossing powder.  The punched strip on the side is a Fiskars punch (Sorry I don't know the name of it).

So there are my three cards.  More tomorrow... Gotta run, I know there is a sale somewhere calling my name!

Thanks for stopping by!

Thursday, November 11, 2010

CardZ Size Information

Hi Everyone!  
I am going to start a Christmas Card Series and wanted to be sure that when I say "This is an A2 size card" you and I would know what I was taking about!

Below is a chart that will give you both Card and Envelope sizes:

Card Size                                          Envelope Size
A2 = 4.25 x 5.50                              4.275 x 5.75
A6 = 4.625 x 6.1875                        4.75 x 6.5
A7 = 5x7                                          5.25 x 7.25
A8 = 5.25 x 7.875                            5.50 x 8.125

Now that we have the measurements for the various card sizes, I think I will be mostly using the A2 and A7 card sizes.. they are easiest to cut and to make envelopes for is you don't have a ready made one available.


I also bought the Cricut Christmas Card Cartridge and will be making all the cards on that cartridge.  Some of them are just lovely... (ok, they are all really nice.)


I will be making videos showing how to make many of the cards and also the method for making envelopes that I really like and use all the time.


So, I am going to get busy in the scrap room and will be chatting with you all soon!


Thanks for stopping by!

Tuesday, October 26, 2010

Let's Hang Out!

Hi all ... Taking a break from all the Halloween happenings and was thinking of a friend that I haven't seen in a while and thought I would send a card to set up a date to get together. This is a standard A2 size card and the little monkey was cut from the Create A Critter Cartridge. He is double sided, so when making him I cut one base, 2 layer 1's and 2 layer 2's. His is "hanging" from a thread that is strung through a 1/16" hole that is on the fold 1/4" from the cut edge. The cut out space for the monkey is 2" x 2 3/4" I didn't do it with this card, but if, ok.. when I make it again I will repeat the pattern paper on the back of the card, to complete the look of a window.


The Let's Hang Out! was written by me. I like to hand write on my cards when possible. It adds just a extra touch of me to the card.

Thanks for stopping by!

Sunday, October 24, 2010

Cricut Cake Mini Demonstration

Cricut has done it again... They are introducing a new machine. The Cricut Cake Mini! Its a Cricut Cake the same size as the Create with all the "advanced" features on the create. Amazing!


Monday, October 4, 2010

It's in the SIGN

Sometimes I just step back and look at my scrap room and think 1-I really need to reorganize things to be able to find things easier and 2- I have so much stuff that I really need to reconsider the next time I think to buy paper or embellies. 3- I need something for the walls!.... Well 2 out of 3 ain't bad!

So I have decided to sort out a few drawers and to make things a bit easier for me.  And then I sat down after running across a few things that I forgot I had and decided to make a sign.  I love the "Live, Love, Laugh" signs that I see in stores and on cards... and decided to make something for my wall.  (somewhere in between all of this I did go to AC Moore, they were having a 40% off sale on paper!)


I used Pagoda for the symbols and MTC to make the words. I really thought this was nice but knew it needed something more.  I used a black gel pen to outline everything, and some Prima flowers and some trim with jewels on it.  I punched holes using my Crop a Dile and strung orange and black ribbon to hang it with. All very nice!


Ahhh... so nice, and now I have something inspirational for my scrap room wall.

I am a member of SOC - there is a badge on the right, if you would like to check it out... Anyway, I am hosting the October Cricut Challenges and my first challenge to the group is to create a tag.  Now I am not talking about your ordinary tag. I challenged folks to use their Cricuts to cut out the tag and use the FIT TO PAGE option! The tag has to be a fall theme and have the word FALL or AUTUMN on it.  So, as the hostess of the challenge I posted the following tag.


I used the window from the Christmas Noel cartridge with the fit to page feature and for "glass" I used acetate I got from a package.  My tree, and lamp post are from Graphically Speaking, and the pumpkins and leaves are from Doodlecharms. The small branches are from a Martha Stewart punch, and the sign on the lamp post are 2 circles layered with leaves and branches.  I plan on making one of these window tags for each season!

Sunday, September 26, 2010

Halloween Greetings and Mini Haul.wmv

Hi Everyone! I wanted to make a card for a good friend of mine who LOVES shoes, and thought I would share the making with you. I like cards with lots of color and a little bling, and this card has it all!

Heres the video:


Leave a comment, Post a link ... Talk to you soon...

Thursday, September 23, 2010

Never Ending Card Tutorial

Hi Everyone! After many false starts here is the tutorial for the Never Ending Card. I hope you can follow along. I did not mention in one section that you MUST have your BOTTOM 2 pieces of cardstock going in one direction and the TOP 2 pieces going in the OTHER. This is very important and I am sorry I didn't say that in the video, although there is an annotation that will tell you.

Here's the video:


If you make a Never Ending Card, post a link below. I would love to see your cards!

Thanks for stopping by!

Wednesday, September 22, 2010

I've Taken the Plunge

I have been thinking about doing a video for the longest time. I have been so worried about how I sound ... lighting... and what ever you can think of I worried about it.

But I spoke with Yoliebean and she told me to not worry and to just go ahead and do it. Thanks Yolie for the encouragement!

So, here it is... My first video and my first Never Ending Card. Wow.. Let me tell you ... for a card bas that is more than easy to put together this card take a lot of thought and time getting your papers and embellies together..

Here is the video:


Please leave a comment and let me know what you think. Better yet, if you have made a Never Ending Card post a link below so we all can see your creations!

Have a great day!

Sunday, September 19, 2010

Quick Card...

I wanted to make a card for a friend that I hadn't spoken to in a while and I didn't have much time to devote to a complicated card... so I got out my favorite tree stamp, a Martha Stewart border punch and a ready made card (more on that in a minute) and the result is the card below. Instead of leaves stamped or drawn I used Stickles to represent the changing leaves. I like the effect!


Ok.. now on to ready made cards... I was in Big Lots and found a package of cards with envelopes 20 cards to a package for a DOLLAR! Yes, a one dollar bill! Alright... so by the time I was through it was more than a dollar because I couldn't just buy one pack. Now I have them in white, off white, tans/browns and one pastel pack. I am all set unless I need a larger card base! Thanks Big Lots!
Posted by Picasa

Saturday, September 18, 2010

How to use CricutSearch.com


Hello everyone! Hope you are enjoying the beginning of fall. The weather here in Maine is getting crisp and more fall like every day!

Have you visited Cricutsearch.com? I love this site. It is another one that I highly recommend. If you own more than 1 or 2 cartridges and you really want a cut of a peace sign are you going to sit around and look through all of them? NO... you're going to Cricutsearch.com and enter your search and it will bring back images of the cuts from the handbooks from all the cartridges that have peace signs!

No more hunting. Just a quick search and you are on your way! Below is a video from the great folks at Cricutsearch.com explaining in much better detail how to use their search tool.


I hope you like this, I can't believe how excited I am about it... Let me know what you think, Leave a comment below!

Friday, September 17, 2010

SOC Friday Night Challenge


I love a good challenge, and this sketch challenge was a good one! I love to sketch and working with this one was easy. I saw it and knew what I wanted to do. An empty cage with the words Miss you... kind of tugs at the heart strings huh?
Posted by Picasa

Saturday, September 11, 2010

Sandi Genovese is on the Web!

This Week’s Episode – September 9, 2010


Hi Scrappers! I have great news. Sandi Genovese from "Scrapbooking" on the DIY network is now doing web based shows! I am so excited. I have enjoyed Sandi for years and have learned so much from her.

I first became aware of her when she did guest segments on the Carol Duvall Show. I remember being completely jealous because she always had the neatest toys ... I can recall thinking there was no way I would ever be able to afford a die cutting machine like she used. (I think it was s spellbinder!)

Now I own a Cricut and a Cuttlebug and cut things out all the time! How time does fly and things change. Check out Sandi's Webipsodes at the link above. You can also download them onto your Ipod and Ipad and watch them while you have down time or waiting in line... and the episodes are free on Itunes!

OH, just a little FYI, I have just completed a really cute Vacation Mini and will post a VIDEO! Yup, I got a great deal on a camera and am going to give putting little videos on the blog a try. Sigh... I am not ready for my close up!!!!

And another thing, I hosted a Cricut Image Swap on Scraps of Color (see my badge in the sidebar) and it was a great success! I will be posting pictures of the wonderful cuts that we have swapped this weekend!

So until them...